Showing posts with label cakes. Show all posts

Wednesday, August 28, 2013

Disney Princess Cake


My little girl turned 3 recently.  How did that happen?  She absolutely adores the Disney princess so I decided to make her a princess castle cake and put on all of the Disney princesses.  Unfortunately, I forgot to take a picture before my youngest took all of the towers off of the castle. 

Keeping the kids away from the castle and not playing with the castle was the biggest struggle I had with the cake.  My youngest especially thought this castle was for playing.  She didn't quite understand that this for eating.  By the time we were actually ready to eat the cake, the princesses had been moved to several different spots.

My daughter already had the Disney princesses and they were the perfect size to be cake toppers.  The castle was made with rice krispy treats, gumpaste and fondant. The cake itself is covered in fondant.  The rocks that you see at the bottom of the cake are chocolate rocks.  They looked incredibly realistic but tasted wonderful.

It's hard to see in this picture, but the half circle portions of the grass are imprinted using a vine imprinted roller.  I thought it brought a touch of elegance and I can't wait to use that roller again.

I'm kicking myself because one thing I didn't think of until later was that I could have used small waffle cones for the roofs of the towers.  That would have saved myself a lot of aggravation from having to mold the rice krispy treats into points.  That also would have probably been easier to cover in fondant and would have created a neat pattern through the fondant.  Oh well, next time. 

Enjoy!
Shayna

Monday, July 22, 2013

Butter Pecan Cream Cake

 
After our nephew's graduation all of the parents got together and did a reception for the graduating class.  One of the parents baked cakes and one of those was an Italian Cream Cake.  By the time I found out about this cake all that was left was the crumbs.  A common ingredient in Italian Cream Cake is coconut which is not something commonly found at our house.  Hubby doesn't like coconut and rather than eating the whole cake by myself, I decided it was a better idea to come up with a version of Italian Cream Cake without the coconut. 
 
The taste of the cake is incredible!  The butter toasted pecans truly add to the flavor so you won't want to skip it.  Sometimes this cake tasted more like butter pecan ice cream and other times it tasted like a cake version of pecan pie.  


Butter Pecan Cream Cake (adapted from Taste of Home)
Ingredients:
{For Cake}
2 1/3 c. pecans, chopped and divided
2 c. white sugar
4 eggs
1 c. evaporated milk
3 c. all-purpouse flour
1 1/4 c. butter
1 t. vanilla
2 t. baking powder
1/2 c. oil

{For Frosting}
 1 package (8 oz.) cream cheese, softened
1/2 c. butter, softened
1/2 c. evaporated milk
6 c. confectioner's sugar

Instructions:
{For Cake}
Heat oven to 350 degrees.  Grease and line the bottom of 3 - 9 inch cake pans with wax paper.  Melt 1/4 c. butter in a large baking pan.  Add pecans and coat evenly with  butter.  Bake for 1520 minutes, stirring frequently.  Set aside to cool.

In a large mixing bowl, cream 1 c. butter, sugar and oil.  In a small bowl, crack eggs and add vanilla.  Add eggs 1 at a time into the creamed mixture.  Beat well after each egg addition.  Sift together the flour and baking powder.  Mix the evaporated milk alternately with flour into creamed mixture.  Stir in 1 1/3 c. pecans.

Pour the batter evenly into prepared pans and bake for 25-30 minutes.

{For Frosting}
In a large bowl, beat together cream cheese and butter.  Mix in 1/2 of the powdered sugar.  Add vanilla and evaporated milk.  Beat until smooth.  Mix in remaining powdered sugar.  Stir in 1 c. chopped pecans.

Enjoy!
Shayna

Friday, July 12, 2013

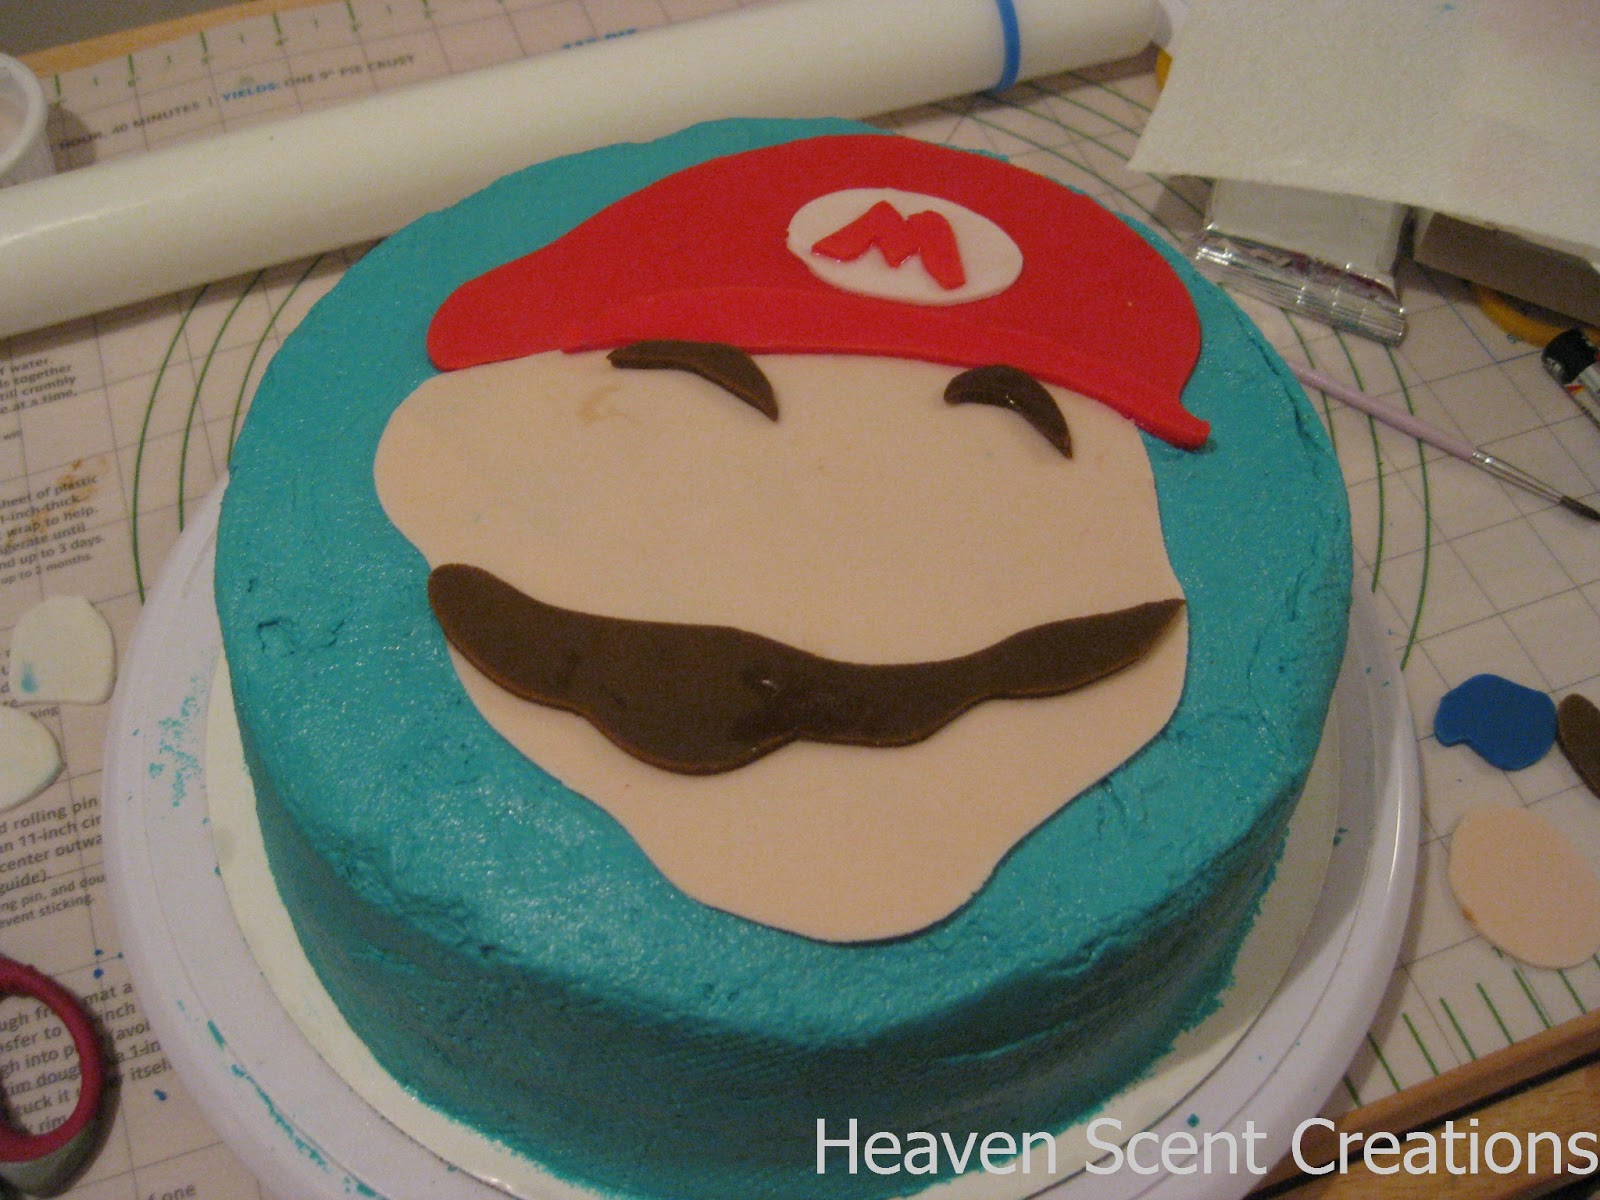
Super Mario Bros. Cake


Hubby's birthday and Father's Day are close together.  We were going to be spending hubby's birthday at his parent's house so I decided rather than bring all of my cake decorating supplies to his parents house I would just make him a Father's Day cake instead. 

We got engaged and found out we were expecting our first on hubby's birthday so it's always been a special day to us.  In fact, hubby played Super Mario Bros. while I was in labor with our first.  It was a 46 hour marathon labor so he figured he needed to do something to keep him from going stir crazy!  The whole time I was making this cake the theme song from Super Mario Bros. was going through my head.

I also decided to do this cake because it's relatively easy and you only need a few cake decorating supplies.  I used pre colored fondant, but you can also just buy white fondant and color the fondant the different colors needed.

You will need:
Blue gel food coloring (for the frosting)
Scissors
Super Mario template
Sharp knife
Red fondant (or red food coloring)
White Fondant
Blue Fondant (or blue food coloring)
Black Fondant (or black food coloring)
Black Food Coloring
Brown Fondant
Tan Fondant
Food Safe paint brushes
Brown Food Coloring
Black Food Coloring
Yellow Fondant


I started by printing out a template image of Super Mario which you can find here.  Please excuse the water marks on the face.
 
 
Cut the Super Mario image out and cut the hat off of Mario.
 

Roll out fondant.  Using a sharp knife, cut out the outline of Super Mario's face.
 
 
Once you have done the outline of Mario, cut out the facial features of Mario.

 
This is the eyebrows, hair and mustache of Mario.


Place Mario's facial outline on top of the cake. (If you look closely you can see the finger prints of my 1 year old.  She helped me out a lot with this cake.  If was peanut butter and delicious!)

 
Place the hat and hat lid on top of Mario's facial outline.  I did the lid of the hat separate and placed it on top of the hat in order to give it more dimension.

 
Place the white of the emblem on Mario's hat.

 
Place the M of Super Mario onto the emblem.

 
Place the brown fondant down for the eyebrows.  You can also paint them on using brown food coloring.

 
Place the mustache on Mario

 
Place the eyes, nose and hair on.

 
Give Mario his blue eyes.  You can also paint the blue and black onto Mario's eyes using food coloring.

 
This would have been a little better had I had an airbrush machine, but I painted a little bit of brown food coloring onto his face to mimic the shadows on his chin, ears and nose.  I rubbed any excess off with a paper towel.

 
I used a star cookie cutter to cut out yellow fondant and painted on the star's eyes using black food coloring.
 
Enjoy!
Shayna
This tutorial was shared on Tuesday Talent Show


Wednesday, February 6, 2013

Birthday Time!

I have to say, I love birthdays and holidays.  I think the main reason I love holidays and birthdays is because I get to do two of the things I love, cooking and baking.  I admit, I definitely use my children's birthdays as an excuse to get creative and have fun with their birthday cakes and to make them cookies.  Two of my children, Wildman and Tinkerbell, are having birthdays pretty soon.  We'll end the month by celebrating Wildman turning 4 and 5 days later we'll celebrate Tinkerbell's 1st birthday. 

We're having a little birthday celebration with friends for Wildman and Tinkerbell's birthdays so I'm bringing cookies.  Wildman has requested Spiderman cookies and hockey cookies.  Wildman has an unbelievable hockey obsession.  I've also decided on butterfly cookies for Tinkerbell.  I was in the middle of putting supper in the oven and Cinderella, who will be turning 2 1/2 at the same time her brother and sister turn 4 and 1, said "Are you making my birthday cake?"  That's when I realized that I would need to at least make some special cookies for her as well.  My kids, even at their ages, have already figured out that when it comes to making and decorating cookies and cakes I'm willing to attempt just about anything. 

Here is my cookie list as it stands now: 

hockey puck cookies
butterfly cookies
conversation heart cookies
spiderman cookies

This list doesn't even include the birthday cakes.  My son has already requested a hockey cake.  The past 2 years I've done a hockey rink cake for his birthday.  This year I'm doing something new!  I'm making him a cake with the logo of his favorite hockey team.  I still haven't quite decided what I'm doing for my youngest.  I think I'll be looking through my cricut cake creations and make something using one of the cartridges.  I received several cartridges for Christmas and I've been itching to use them.

Shayna